"The Venture Bros." is one of the best shows on television right now. Though there tends to be long breaks between seasons, much to my dismay, nearly every episode of this series is a gem that provides just the right mix of comedy and action all wrapped up in a comic book-y style that I love. There's so much to love about this show.
When I found out that we were going to Comic-Con, I knew that I wanted to put a costume together to join in on the festivities. I'd never done anything like it before, but Larry had recently dressed up as Lion-O at the New York Comic-Con and Macho Man at the Pittsburgh Comicon, each with good results. Since Larry was going to make the trip to San Diego as well, I quickly suggested that we dress up as Venture Bros. characters, as many of the characters on the show are ripe for costumed emulation. I had originally set my sights on the Monarch from the "Operation: P.R.O.M." episode, but a quick Google search revealed that someone else had already done it, and had done it so well that I had no chance of ever topping it.
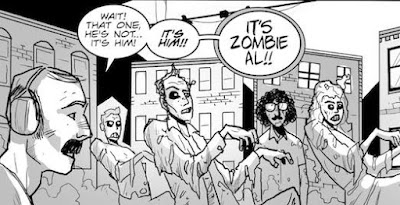
I wanted to do something more obscure and unique within the Venture Bros. realm. After some thought, I came up with henchmen 21 and 24 in their alter ego personas as "Jet Boy and Jet Girl" (the Damned to a cover of it...) from the season two episode, "Fallen Arches". As the episode explains, 21 wanted to branch out and moonlight as his own villain, so he gets some "Family Double Dare" costumes, some jet packs, and does his best to convince 24 to join him in his schemes.
I was happy with about 95% of the final result:
It wasn't as easy as just going to the store and buying a deluxe "Jet Boy and Jet Girl" costume, though. I thought that it'd be at least somewhat interesting if I put together a little tutorial on how the costumes were constructed. If nothing else, it gives me the excuse to post all of the pictures I took at Comic-Con.
With so many different parts to choose from, it's hard to decide where I should begin. I guess I'll start from the top and work my way down, so leading us off will be...
...the head. There are a lot of different aspects to this part of the costume.
Goggles
Goggles are, arguably, the most important aspect to any Monarch henchman costume - more important than the suit, the gloves, heck, even the wings. A crappy pair of goggles can ruin an otherwise good suit in my opinion. I was looking for materials to make my own when I found
John McDonald's "Cinemastery Studios" Etsy store. John is a fellow fan and he makes some great stuff, as a stroll around the online store can attest to, but the goggles are what really stand out to me. Not only do they look good, but they're also functional - in as much as red fish-eye lenses can be. There was no way I could improve on the goggles by making my own, so I ordered two from John and was not disappointed.
Mask
As you'll find out the longer you read this, John at Cinemastery Studios helped me out with more than just the goggles. After buying the goggles, I kept in touch and asked him questions when I was stumped, and he was always very gracious with his time. I knew that I wanted to buy a ski mask, but there are so many different variations of the classic black mask. 21 takes his goggles off in one episode to reveal a mask that comes down to his nose with only two small circles cut out for the eyes. That particular design must only exist in fiction, because I was never able to find one that was just right. John sent over a link to
an eBay auction with the above mask. With some creative sewing (thanks to Larry's mom), we were able to cut out the mouth and make this work. It was lightweight and it served its purpose.
Helmets
Finding these helmets was a result of luck more than skill. Larry and I searched through Dick's Sporting Goods one day for both bicycle and skateboard helmets without any success. The big problem: the 'brim' of any helmet we tried on came down over our foreheads too far for the goggles to fit underneath. I thought I might have to do something drastic and try to shave a few inches off of an existing helmet.
Then we walked through Wal-Mart, found exactly what were were looking for, paid $20 each and got the heck out of there.
The helmets pictured above are Mongoose-brand, and I believe they were sized for kids, believe it or not. We took the velcro-ed in foam out and they fit pretty well. Best of all, the goggles worked just fine with them.
The helmets were originally all white. I peeled off the logo stickers and used a white primer over the outside. I then taped off the outside areas and used red spray paint (Valspar, I believe) over the middle. Finally, I used a glossy clear finisher, and I think the results were more than satisfactory.
One issue with the Mongoose helmets was the straps. The cartoon is a bit inconsistent and shows them at times to be black and others to be blue. The helmets had red straps, though, and that wouldn't do. Larry and I used black duct tape to cover up the red. If you look at a screenshot from the show, you'll see that 21 and 24's helmets had a white chin pad. The Mongoose helmets had straps that came down to where your chin meets your neck, so a pad was out. We used white duct tape on ours, and that was good enough.
Bucket and Hand
As part of the Double Dare theme, Jet Boy and Jet Girl had helmets with physical challenge-esque props on them - specifically, a bucket and a glove. We found the bucket in another auspicious moment, walking the aisles of Target. What we ended up with might be a little big, but it worked well for our purposes.
The glove was another story. I fretted over trying to find something that looked good, but none of the options I came across were feasible. I thought about making a wax hand mold (too fragile), stuffing pipe cleaners into a dishwashing glove (wrong color) or blowing up a latex glove (dumb). I had an epiphany and remembered that I had seen mannequin hands in Michaels. Artists use these hands for reference when drawing, well, hands. I drove to Michaels and, to my dismay, they only sold right hands. 21's glove is clearly a lefty! But once again, eBay came to my rescue and I picked up an
Art Advantage brand wooden hand.
Larry's mom meticulously created a glove for this wooden hand using the gloves I wore as a pattern. Both the bucket and hand were secured to the tops of the helmets using velcro strips. The hand was a little heavy (as it was made from solid wood), but the velcro hung on throughout the convention. It might have fallen off two or three times, but it was manageable.
As I went through security, I wondered if airline employees would scan my bag and see a hand in there. I guess I would have made the news if that were the case, but luckily I made it out (and back) with no severed-hand-related problems.
Speed Suits
Moving right on down the body, we come to the biggest part of the costume - the red jumpsuit, or as Rusty Venture calls them, "speed suits"! These are, as I found out, a pretty common design, with all the pocket and belt details matching with what was shown on the episode. A number of retail stores - not just specialty stores - sells them. Just not in red. Oh, you want grey or blue? Then you're in luck. But red was really difficult to find. I was considering buying white suits and trying to dye them red (which would probably have ended with us wearing milky pink suits) when a poster on the
Venture Bros. Cosplay Facebook page came upon my saving grace - a link to the following site:
http://www.myjumpsuit.com/eppolstret1.html. Hooray!
As might be expected, these were the priciest items to buy (though perhaps not per square inch). At $50 each plus shipping, it was a little tough to think that I'd be paying that much to wear them for one day, but I had to bite the bullet if I wanted to complete the costume, and I of course did.
Turtleneck and Vest
The classic Monarch henchman costume comes with a gold vest and black turtleneck to go underneath. Neither of these would be particularly visible with the red jumpsuit over top of it (especially the vest), but if you look at the screenshot I've provided, you can see just a hint of gold poking out at the neck of the jumpsuit. I figured that there was no sense in leaving it out, I once again called on John of Cinemastery Studios for advice, and once again he helped out big time. It turned out that he had a vest lying around (really), so I bought it and some extra material from him. Larry's mom used the one vest as a pattern for a second, using John's scrap material.
The turtleneck is a black turtleneck. That's pretty much it.
Gloves and Tights
On the advice of many, I went straight to the
"We Love Colors" website to pick up the gloves for the costume. They were exactly what I was looking for. Because I was feeling the need to over prepare, I also bought gold tights to wear underneath the jumpsuit. I figured that if I was walking and the pant legs came up at all, I didn't want to ruin the illusion by having my bare legs show or something other than the correct color. It was, as I said, over-preparation. But I'd rather overdo it than be caught without something I'd need.
Larry's mom, for some reason, thought that the tights were a terrible idea and that they'd be really uncomfortable if we wore them all day. And as a woman and someone who had worn tights before, she was in the best position to say. But she was wrong! I wore them all day and they were great. Larry had, I think, a gender identity crisis and decided not to wear the tights, but rather a sock-with-gold-material-draped-on concoction. This is why, in pictures, you see Larry's white socks. COME ON, LARRY! We all make sacrifices when doing the costume thing.
Belts and Knobs
The material I bought for the belt, surprisingly, ended up being very expensive. I found it at Joann Fabrics where it was on sale by the yard. By "on sale", I mean they were selling it, not that it was reasonably priced. It was not. It's made of stretchy elastic material. It's just for show - that is, it's not holding anything up on the costume. We cut the material to fit us and used sick-on velcro strips the attach it once it was on.
The knobs turned out pretty well for how simply they were made. These were made from the lids of spaghetti sauce jars (now you see it!). Because the lids were made of metal, I had to paint these in several layers - first a layer of primer, then metallic silver, and then (taping off most of it) a touch of flat black. We had to glue some cardboard to the inside so it would be flush with the belts, and then some more velcro strips finished it off.
Elbow and Knee Pads
While looking for helmets at Dick's Sporting Goods (a feckless endeavor), Larry and I came across volleyball elbow and knee pads. They were completely white, but we got them anyway since I've never seen volleyball pads that weren't a solid white. The Jet Boy and Jet Girl elbow and knee pads, though, have white elastic and black padding, which matches with the color scheme but isn't something we found in our search. Never fear, though, because Larry cut up a black shirt that he hated and his mom sewed the pieces on, making nice looking black-and-white elbow and knee pads.

Shoes
I got a pair of cheap slip-on shoes from the local
Gabriel Bros. (what, those stores aren't all over the country?? At least I kept with the "Bros." theme) with the understanding that they'd be ruined. Some fabric glue and the extra gold fabric used to make the vests saw to that.
Jet Packs
Making the jet packs was easily the most daunting part of building the costumes. As such, I put these off until last, and they were made, for the most part, just a few days before we left for San Diego. This meant that there was practically no room for error and if things didn't go exactly as planned, I had to live with a little imperfection. Overall, I'm happy with how these turned out, and I'm ecstatic that they made the trip from the Pittsburgh International Airport to Los Angeles International Airport and then by car to San Diego without incident. If I had to do it again, though, I would probably tweak a few things.
The animation from scene to scene varied a bit over the course of the episode. It's not something you notice when watching a show, but as I was comparing several different still shots from different points in the episode, the little inconsistencies stood out. Nowhere was the more obvious than in how the jetpacks were drawn at different times. In the end, I took what I thought was the best representation of the suit as a whole and went with it.
Backs and Straps
There's no pattern to work from for this particular rocket pack, so I had to make educated guesses as to how big the backing would be. Take a peek at the picture below:

It looks like the base goes from the middle of 24's shoulder blade to right above his waist. I used this as a general model and cut out a rectangle out of a cardboard box. I estimated for the tapered "butt panel" as well. I used duct tape on the edges (so it didn't look like, well, cardboard) and spray painted the heck out of them with metallic silver paint. I used tiny hinges to attach the larger piece to the smaller, a move that worked surprisingly well.
For the straps, I staked out a couple different Goodwill stores before finding a couple backpacks to cannibalize. I cut off the nylon straps and used screws (with flat ends) to attach them to the cardboard backing, using nuts to secure them from the other side. This also worked out surprisingly well.
Rockets
Even though I briefly considered balloons and papier mache, it seems obvious now that I'd have to use pop bottles for the rockets. As you can see above, I went to the store and bought eight two-liter bottles of some of the worst soda that's ever been made, and also Cherikee Red, which is delicious. Other than the wonderful cherry soda, I chose based on price. I did try some of each before dumping out the contents, and I can safely say that I'll splurge and pay the extra 12 cents for more name-brand grape soda. It was offensive just how bad some of it was.
I owe some thanks to a
website page dedicated to replicating the "Rocketeer" jet pack. Even if I didn't go with what they suggested all of the time, I often took some of the directions to heart.
After cleaning out the empty bottles, I cut the necks and bottoms off of all of them. On four (which would be the top of the rocket), I left the heck holes the size they were cut at. On four others (the bottoms), I cut into the "body" of the bottle to make a larger hole. I then spray painted each bottle with a primer and then the same metallic silver paint that I had been using on everything else. Once dry, I used duct tape to fix the bottles together, bottom to bottom.
For the light blue coverings on the rockets, I broke down several cardboard cereal boxes and spray painted them. I cut strips off and used those to wrap around the bottles, covering up the lines where the bottles were cut.
This is something I'd do differently if I had the chance to do it again. Instead of cardboard, even thin cardboard like what a cereal box is made out of, I'd use something less rigid, like...paper. I think it would have held up and there wouldn't have been visible seams.
Caps, Exhaust and Separators
For the light blue nipple looking things on the top of the rockets, I followed the
instructions on the aforementioned Rocketeer how-to website, using a mug, scissors and tape. They turned out well and were easier to make than I thought.
The exhaust ports were Solo cups painted and turned upside down. We shoved 'em in the bottle holes and that was that. Simple.
In between the rockets, you'll see that there's a rectangle to separate them. Larry and I rolled up bubble wrap to use as a base, cut out pieces of cardboard to serve as support, and then duct taped the hell out of it until it looked right. After spray painting this, too, everything was ready to put together.
We tried a few different adhesives to stick the rockets to the base - hot glue, silicon glue, and tears. But in the end, good old fashioned duct tape was our best bet. When we had a minor crisis during the convention (Larry's rockets were coming unstuck), duct tape saved our butts again. Thank the stars for duct tape.
So there you have it...if you've got the inclination to make your own Jet Boy and Jet Girl costume, you've got some idea on how to do it. It was a lot of work and a lot of money to get everything to where it was, but in the end I think it was very much worth it. Larry and I had a great time, met some new people and took a whole heck of a lot of pictures. We saw a few other Venture Bros. costumes while we were walking around, but not too many. We dressed up on Saturday of the convention, while many others wore their costumes on Friday, which was the day the Venture Bros. creators hosted their panel.
We did run into this gal with a great Dr. Mrs. The Monarch costume near the Adult Swim booth, though. Yes, Larry, we were all excited about the skimpy nature of the costume.
One highlight of the day was showing up on the G4 Network for a few of their bumper shots. I never got to see it myself, but I did find some Facebook proof, which is almost just as good...
We also got to, completely at random, have lunch with Rotten Tomatoes EIC Matt Atchity. He interviewed us about our costumes (and our booth) for SiriusXM satellite radio! He was a great guy and it was lots of fun talking about Venture Bros. on the Comic-Con channel for a few minutes.
All right! Some of our pictures showed up online as well, including these:
This one showed up on the
Venture Bros. Blog's Twitter feed.
This one was taken during Ben Edlund's panel. To sit down we had to take the jet packs off. Note that people were apparently throwing money in Larry's lap, not as uncommon an occurrence as you might think.
And of all the ones I found online, this one was absolutely my favorite. On Saturday morning, Larry and I went outside to hand out trading cards to some of the attendees. I love the palm trees in the background.
I was surprised at how many people at the convention recognized the costumes. Not that it wasn't what I was hoping for, of course, but I realize that we were wearing the costumes of obscure, one-episode characters (at least as far as the Jet Boy Jet Girl identities were concerned) from a show that doesn't have the recognition that other cartoons (Thundercats, He-Man, etc.) might enjoy. Even so, as we were setting up our booth on Saturday morning, someone ran up to us and started quoting the show. I had a number of people ask us which one of us wanted to be Jet Girl. And we took so many pictures. It was all very fun.
One of the big highlights, of course, was getting to meet the creators of the show, Jackson Publick and Doc Hammer. We ran into Publick at the New England Comics booth on Friday (he wrote a few issues of
Tick: Karma Tornado before moving on to television work) and Larry let him know what we had planned for the next day. We were able to get a picture with both Publick and Doc Hammer after Ben Edlund's panel on Saturday.
It was nice of them to take the time and snap this photo with us. I hope that they enjoyed our little tribute to their show, which is one of the best on TV. I hope it stays on the air for ten more years and/or gets a big screen movie release.
Speaking of things that take place on screens, we broke out the costumes one more time for an upcoming episode of
Franks and Beans. I'm totally spoiling it, but oh well. This post is all about Jet Boy and Jet Girl, so the video gods will forgive me.
I hope you enjoyed this winding, rambling description of the Jet Boy and Jet Girl costumes that Larry and I wore to Comic-Con. I've been wanting to get this online for weeks now, but I knew it'd have to be long (that lived up to the billing) and didn't always have a couple hours to spare. If you're a fellow Venture Bros. fan and are thinking of making a costume of your own, then my advice is to go for it. There's a lot of time, money and effort involved, but it can be fun and for us, that rang true.



 Posts
Posts